How to measure & Easly Fix Glass Splashbacks In The Kitchen
To create a clean and airy space for your kitchen, a glass splashback provides unique ways you could do this. Aside from adding a fantastic color tone to your kitchen, it has a reflective and sleek surface that fits into any modern kitchen. It also helps to prevent food being dished out from splattering around. But how can you install this glass splashback on your kitchen, it quite simple!
HOW TO INSTALL AND FIT A GLASS SPLASHBACK IN A BATHROOM OR KITCHEN.
This guide will reveal what you should know practically before setting out to installing a glass splashback. You will learn the necessary steps from this guide on how to intall a glass splashback sucessfully. You will discover the different kinds of splashback available, the exact type of splashback that’s suitable for you, how to know the size you need as well as its measurements for cuts like electrical sockets. You will also learn the type of splashback fittings you can use, and how to ensure your walls and fittings are ready before fixing your splashback to produce an amazing finish. Colored glass is meant to improve the style and design of your kitchen and create an amazing feel. You can safely place a glass splashback behind cookers or sinks. It can also serve as an alternative to tiling or used for any unfinished surface between wall units and worktops.
DIFFERENT TYPES OF GLASS SPLASHBACKS AVAILABLE
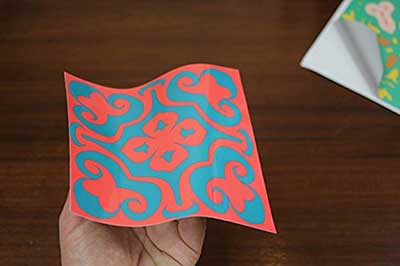
Glass splashbacks are produced in different design, color, and style. Most bespoke glazing companies have a fitting glass splashback for any wall color. Nowadays, digital printing can be easily embedded into glass surfaces by supplying your name or an image which is embedded in the glass surface. It is much fun to have portraits of family members hanging on the wall or like we saw once, a picture of a homeowner performing DIY jobs on the glass that displayed the images.
You can also choose to get backlighting to be installed for your glass to produce different lighting moods and highlight some areas of your visual images.
You can easily change the finish panel into different shades of gross, matt, metallic or a frosted look. You can get splashback of any shape from Bespoke manufacturers. So it’s not compulsory that you must have tiles that are rectangular or square.
You can increase the length of your glass splashback to fit into your entire kitchen worktop length. (these kitchen worktops can be created easily in toughened glass). If you have a standing cooker or a stove, your splashback can be fixed below the work surface height at the rear of your stove/cooker, and this will provide a give a clean look to your splashback. A glass/ electric hub can be fused into the surface of your worktop; then you can measure the height and the width of the space you want to fill with your glass splash.
WHAT TYPE OF GLASS SHOULD I USE?
A right splashback requires the use of a toughened glass. This implies that if you are using screw fittings to fix the splashback, you will have to pre-drill the holes of the splashback utilizing the glass splashback provider. Before the glass gets toughened, you will have to make the necessary “cuts outs” for power sockets, Telephone sockets, and TV sockets, else you can’t do it when its toughness.
To most people, toughened glass is made just like normal glass, and any actions such as hole cutting are performed on the toughened glass. This is far from the truth. All glass is made just like ordinary glass, whether it’s laminated, Georgian or plate glass; and the glass is thereafter toughened.
However, you have to confirm from your cooker, splashback provider or a stove manufacturer about the required minimum space that must be set between the gas jets and your glass splashback or electric heating elements.
THE REQUIRED MEASUREMENT OF A SPLASHBACK
You have to decide on the perfect location for your splashback and how much space it’s going to take on the wall. After doing this, a piece of paper is the best place to record your measurement and findings. Draw out a design of the entire wall, to scale the area the splashback will cover. Ensure you take into consideration other items on the wall such as cooker hoods, cupboards, sockets, and switches according to the image below, in their proper locations.
Victorian Mosaic Tile Decals – Click Here

If you decide to use screw fittings, then you must get the exact measurement and know the correct place they should be then summit ti to your splashback supplier. Then your splashback supplier will be responsible for making any cut or drilling holes on your splashback before t is toughened because any adjustment cannot be done once it gets toughened.
If you are buying from a supplier, then its worth it because one or more reps will assist you with the measurement. Although you might incur some additional costs, these guys are experts, and they will bear the cost of giving you an incorrect measurement. Unlike when you supply them with your plans and analysis.
One thing you should take note of when measuring is that you will have to give a 2mm gap all round so you can use a sealant to seal it up to prevent the inflow of moisture or water. Unless your gas splash is going to be fixed behind your cooker as outlined below.
Multi Mosaic Tile Decals – Click Here
A splashback cutting plan with cuts for cooker switch, sockets, cupboards and cooker hoods.
TYPES OF SPLASHBACK FIXINGS
There are two ways you could fix a glass splashback to a wall.
ADHESIVE FIXINGS
SCREW FIXINGS
Applying adhesive is the easiest of both methods because you only need to use it on the rear corners of the splashback and then push it into its rightful position on the wall. Ensure it gets enough support until there is a Splashback mirror fixing or screw fixing curving of the adhesives. With this method, there are no fixing points, and it produces an elegant finish.
Grey Victorian Tile Decals – Click Here
![]()
Adhesive for fixing splashback to a wall.
SCREW FIXING
Fixing a screw can be difficult most times because you will have to screw it into the splashback. You have to apply caution because the screw head might pull into the glass if you do it too tightly. And the lens might get cracked. When such happens, the screw head will need a replacement and no matter how you may try to hide it; it will still be visible.
When it comes to fixing, you have a lot of styles to choose from, and they usually come with a splashback kit when you purchase one. If not, you can easily get yours at the local DIY store.
However, if you are getting it yourself, ensure you get something with internal threads in the head. With this, you can easily screw in a “finishing cover.”
Decorative Mosaic Tile Decals – Click Here
Splashback mirror fixing or screw fixing
PREPARING THE WALL SURFACE
Irrespective of the fixing technique you want to adopt, you need to perform some tasks before you can effectively fix the splashback on the wall.
CHECK THE CONDITION OF THE WALL AND PREPARE IT FOR FIXING
You need to ensure the wall is in good condition before fixing anything on it. Ensure you remove any existing wallpaper, scrape off any flaking paint and make sure the surface is flat. Glass cannot bend the surface. Hence, it needs to be flat, and any real deeps must be properly filed with a filler and sanded down. Also, consider replastering the surface if it’s too wavy or isn’t smooth to your taste.
CLEAN THE SURFACE OF THE WALL
Once you have removed any unwanted material from the surface, you need to clean it properly with a good cleaning agent to remove any tough stain, grease or dust. If you are applying adhesive to a plastered board or a bare plastered surface, ensure it’s sealed first. It will enable the adhesive to stick tightly, which is needed due to the porous nature of the plaster and plasterboard. So they won’t soak much moisture from the adhesive. After that, allow it to dry easily.
SEAL ALONG BACK OF WORKTOPS
Ensure you seal the back of any worktop surface using a silicone based sealer (between the surface of the wall and the top of the worktop) that the splashback will be close to. This works together with the applied sealant, around the splashback edge. And if water or moisture gets in through it, then; it will be prevented from going down the back of any worktop and behind the units. If this occurs for some time, it will cause corrosion and rust of the units.
HOW TO INSTALL A GLASS SPLASHBACK
FIXING WITH THE USE OF ADHESIVES
Before you apply adhesive, it’s important to place the glass in a proper position to make it fit properly around the cupboards, sockets or cooker hoods. After sizing up the fit, put the splashback on top of the worktop surface after removing it from the wall. Ensure there is no dirt or dust on the surface you are placing it on to prevent a scratch.
If there is nothing you can rest the splashback’s bottom edge on, while the adhesive is not yet dried, then you should fit in a batten unto the wall to fully support its weight until the adhesive is completely dried. You will have to fasten the batten unto the wall and keep it strong, so it doesn’t fall off easily, so your splashback doesn’t fall and crash. Ensure you give the recommended 2mm gap when fixing the batten.
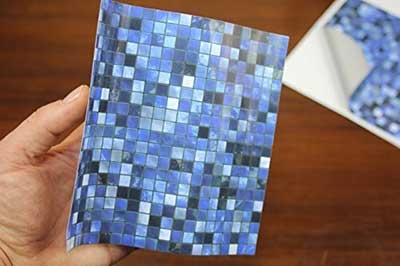
Midnight Blue Tile Decals – Click Here
Batten fixed to wall supporting splashback until the adhesive has fully set You will need some 2mm chokes you can rest the glass easily on to give the recommended 2mm gap above the work surfaces and at the bottom of the splashback. You should remove them when the adhesive is completely set. You will find these in the kits.
Place the adhesives to the glass rear in dollops. Each dollop has to be within the range of 20-30mm in size, with a space of about 80mm between them. Ensure there are approximately 40mm dollops around the edge of the glass whenever it’s pressed against the wall, they shouldn’t spill out from the corners.
Regarding adhesive, make sure you ask the supplier of your splashback about their recommendations. They should be capable of supplying it. In some circumstances, you can use Gripfill, adhesive pads and No-nails which is a suitable construction adhesive. But always check out for the heat resistance in the adhesive.
After applying the adhesive, place the flashback back to the wall, and use a clean cloth to clean it gently while applying a little pressure. You may need help to assist you.
Use the cloth h rub the surface gently to feel any rough areas in the adhesive in the absence of a support. Ensure you pull the glass off of the wall and apply more adhesive to the affected area. Watch out for any uncovered areas in the adhesive, and ensure they are properly filled. Ensure the chocks are at the right position, and there are some equal gaps around any cupboard, sockets or cooker hoods. Once it’s ready, gently remove the batten and chocks from the base.
FIXING USING SCREWS
Just like the adhesive mode, before you identify any drill point, place the splashback again on the wall, and ensure it fits incorrectly, also creates an equal gap around them. When you are sure about the fitness, place the glass again on the wall and use a pencil to mark the center, to identify all the fixing points that you need to drill. After that remove the glass and keep in a safe place.
Grey Tile transfers
Mark all the points that needs to be drilled on the wall.
Use a suitable drill bit (usually 5mm) to drill the fixing point to the specified depth level. Place the splashback again on the wall; you may need someone to help you hold it properly against the wall, while you fix it.
Starting from any drill point (left edges first, then right to keep it in position). Fix in each fixing screw, but avoid using an electric driver or drill because you may end up screwing them too tightly and the glass may crack. Ensure you use a hand-held screwdriver instead. Tighten it to the point that the screw head becomes choked in the glass hole and it doesn’t move anymore. Once you finish screwing, add suitable finishing covers to hide the screw heads, and you are all set.
SEAL AROUND EDGES, SOCKETS, CUPBOARDS, ETC…
No matter the fittings you applied, you should also apply a thin bead of sealant on all the edges, and this includes the sockets and the base; using good sealant and an applicator gun. After this, wipe off the excess by running your finger through it. This will produce a nice, and firm looking edge.
Turkish Mint Tile transfers

See also: Tile Stickers Calculator, Why Cheap Tile Stickers Are So Good? How To Pick The Best Colour?
How To Apply Peel And Stick Tile Covers?