REPLACING KITCHEN SINK, MAJOR PROBLEMS AND HOW TO AVOID THEM
READ ABOUT, REPLACING KITCHEN SINK, MAJOR PROBLEMS AND HOW TO AVOID THEM
This article is written to explain more on what is involved in replacing a sink and the possible difficulties and also a way you can mitigate them.
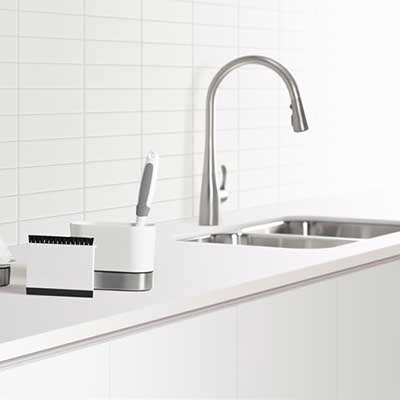
What to consider when changing a sink?
If you buy a brand new sink that is a bit larger than or even similar in size to the original, since it is difficult to try making holes in smaller size! It may also be relevant to extend the real pipes to fit the new sink. This really is task which a plumber will probably want to carry out in order to ensure no problems. However, if you are changing the sink’s position to a different place like to the kitchen area, then you will want new worktops an
a lots of pipework for cool or warm water accompanied with the waste.
When selecting a new kitchen sink, you should consider the cost, looks and performance. Each will specially be used when choosing materials for your sink because there will always be some few compromises that will be made during the process.
For example, a cast metal sink in the kitchen is stunning, although they require plenty of hard work to stay that way! Stainless steel sinks appear beautiful as they are less expensive and affordable, however they show water marks and also it is so easy to scratch the surface.
Composite granite coupled with quartz sinks are also turning more and more popular, nevertheless they are highly pricey as well and are also not actually reliable either, regardless the belief of the public. The standard of the sink required depends on what you use it for, the regular sizes to choose from are double bowl, one and a half bowl, or single bowl.
The size of your sink is all in your palms, this can depend on your budget or the type of appearance which you really need to make in your kitchen. When it has to do with real material which a kitchen sink is produced from, the most greatest choices include fire clay ceramic, stainless, igneous and also granite. Every and each material has its pros and cons, that means you really have to weigh up the disadvantages and advantages to know which is perfect for you.
When purchasing a nice brand new kitchen sink, most people will like to have at least a few lovely new taps, or have a complete new worktop! Having your kitchen worktop replaced is not just about developing the looks and renovating your kitchen, thus you may not have many choices in any case.
Most times, a new worktop will probably be required anyway when the sink is really different in shape and size. When you are about to carry out this job as a do-it-yourself job, there are many potential pitfalls, the most important of when you get a wrong measurement of the brand new sink and also create a hole that is way too big in the worktop, or maybe when purchasing a brand new worktop with the manufacturer to have one with a hole which is really of a greater size for the sink. There is nothing that can be done concerning this, as you are left with no option but to purchase a brand new worktop! To assist you save this potential trouble, we have made an index of relevant solutions that you can help you to avoid such problems.
Main Problems of Sink Replacement
Common pitfalls that can change your project into a mess and a way of avoiding them
HOW TO PREVENT THE TEN MOST FREQUENT PROBLEMS.
Do you have your eye on deeper sink? First, Measure the tailpiece!
MEASURE THE TAILPIECE
You can basically pick a brand new kitchen sink using a more deeper basin unlike what the current sink has got, but if it is hanged down very low, it will not wash out potentially and you will have to lower the cleanness tee connectivity within the drain line in the wall structure. Also, You will accurately need to avoid this process if the connection is steel and happens to be behind the base cabinets. A plastic pipe is way simpler if you have to get it conveniently. An accurate tee connection may be needed depending on wherever the waste products and to go into the wall.
Examine the sink tailpiece very well in between the container strainers together with the tee. This dimension is more concerned about the depth that can be fix to the sink bowl even without reducing the drainpipe passing through the wall. However, always know that a brand new sink often posses a lower drainpipe than that of your current one though it can sometimes be greater than the tee. If the disposer drainpipe is not going higher, get a sink with a distinct depth bowls. You will get a shallow bowl for the disposer and a thorough bowl for recipes.
Always be sure that the new sink will close the old hole.
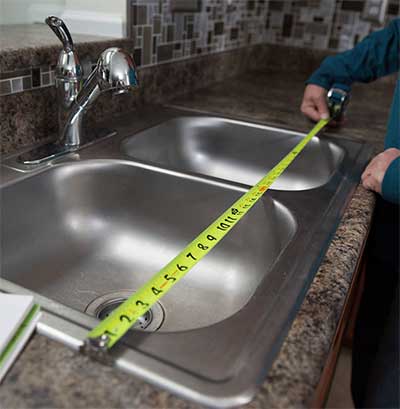
CHECK THE CUT OUT SIZE
A kitchen sink which isn’t big enough for the countertop hole will surely leave bad gaps along the edges (and perhaps fall all round the hole!). Before you get rid of your current sink, measure the opening first from underneath. Examine all of the four corners because the cut-out probably won’t be square. Pay great focus on the edges. Installers normally cut them exactly at 90-degree angles (instead of rounding them off) because it is much more faster. Take the dimensions with you when you want to purchase a new kitchen sink, also be sure it covers up the opening, and any square corners. If you can not have a sink that will fit, purchase a larger one and enlarge the opening.
Swollen countertops spell Trouble
ALWAYS CHECK FOR STAINS CAUSED BY WATER.
Leakages around the kitchen sink corner can stain the particleboard underneath a plastic laminated countertop. Slight water damages is common and will not damage your new sink. Although severe swelling can cause the new sink not to rest flat on the countertop. And a weak particleboard would not give a solid base for the clips which conjoins the basin to the countertop. Always inspect the countertop exteriors surrounding the sink. Look for places or areas that the laminate have become loosened in the particleboard. Following that, inspect the countertop from underneath the sink for areas that are too squishy to help sink clips and support the kitchen sink as well. If you come across any of these problems, change the countertop.
Use Seal with caulk , not putty
USE THE CORRECT SEALANT
Plumber’s putty has often been the regular sealant for sink rims and frequently even sink baskets. The major challenge faced by putty is the fact that it surely dries away, causes leaks and breaks. To make things worse, it can damage some plastics, and even some plastics used in making sinks. Stay clear from disasters and drips by using silicone caulk in its place. Always make use of a kitchen-and-bath silicone which needs a solvent clean up. Use a bead around various sink openings when you are fixing the sink, also make use of a bead around the wash out openings where you set the basket strainer and disposal drain. Wipe away all additional caulk.
WEDGE THE SINK
Place a flat wedge across the cabinet base level. Self-rimming designed iron sink units are often kept with caulk. If you are replacing your sink but maintaining your laminate countertop, you will have to reduce using the caulk. This might be tricky, especially if the caulk has already solidified. You will need a lot of endurance with these products: a few ft. of 2×4, shims, stiff putty knife and shims including a heavy solid power knife. Wedge a 2×4 in-between the kitchen sink base and the cabinet flow to create little upward force. Following that, the caulk should be reduced. If the caulk is too hard to reduce, hammer a heavy putty knife through the caulk, sending it towards the sink a piece at any point in time. When you have reduced the edges, back corners, and also front, rise the kitchen sink upwards and the remaining caulk should be reduced from the base part of the sink . Shift the sink and wipe off the caulk that is left from the laminate.
Remove ALL the old caulk
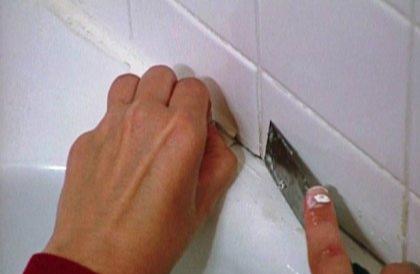
USE CAULK REMOVER
The caulk surrounding your new kitchen sink is just what will take a position between the water damage and current countertop. For a watertight, long-lasting relationship with the countertop, it is very relevant to completely destroyed the old caulk. Take off the old sink, following that plumber’s putty (scrape off the caulk), with a putty tool. Utilize a caulk remover (sold in home centers) to remove caulk. Leave the caulk remover to sit for few hours, and then wipe off the softened caulk. Also, apply nail polish remover or rubbing alcohol remover to wipe off remains, after that you are free to clean the surface using water and a sponge.
Get the gunk out
FLUSH OUT SEDIMENTS
Concentrating on the water traces normally shakes sediment loose. The last thing you will like is for these disposals to thicken your new faucet. Avoid this issue by removing the old lines first before hooking up your new supply lines. When the entire job is finished including when the brand new supply lines are fixed to the faucet, tighten the old pipes, convert the water totally for a full minute to wipe off any dirt in the lines. Following that, join the brand new lines with the shutoff valves. After four days, remove the aerator from the faucet and wipe off every sediment that might has seeped through.
Be sure you have sufficient holes
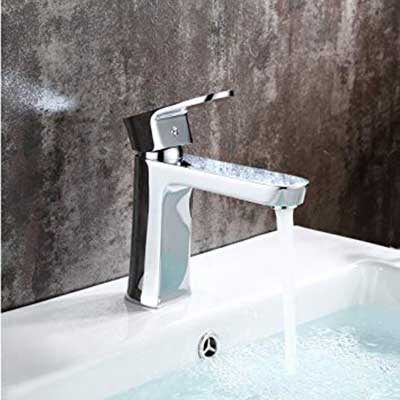
MATCH FAUCET WITH SINK OPENINGS
Almost every sink is design with three holes for the faucet with the fourth hole for a gadget, for instance cleaning soap dispenser or a sprayer. Although few faucets require a two or even a single or hole. You can get plugs for untouched holes, however, they do not generally fit the sink. When the sink does not have enough holes, creating an extra hole in cast iron or stainless steel is usually unachievable and difficult. To stay far from these problems, select the accessories and faucets first, and then buy a sink with a fitting digit of holes. Most sinks have “knockouts” to help you drill to get an additional holes. You can also special-order sinks with the number of holes you will need.
Trash the old parts
CHANGE THE ENTIRE WASTE ASSEMBLY
Resting the temptation of preserving a few bucks by still using the obsolete drain pipe. The threads are likely worn out and won’t make a strong connection. Purchasing a new drain set up is simpler to install and likely leaks are reduced. Instead of shopping for each unit for the drain, get a pack from the home centre which contains all you need. A sink kit includes fixtures, drainpipes, provide lines, shutoff valves and even new basket strainers.
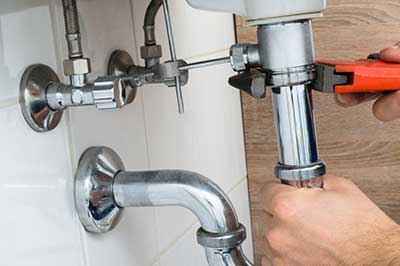
First test the shutoff valves
REPLACE LEAKY VALVES
If your shutoff valves underneath the sink do not function or you do not own any, you will have to turn off the water supply of the whole area while replacing the sink. This may could result to domestic strife, especially if the task becomes a full day or longer operation, therefore estimate the valves job before visiting the home centre.
To examine the valves, lock them and turn on the faucet. The faucet might drip for a few minutes, but if the drip continues, then the locked valves are leaking. Change or fix worn-out valves. If you are buying new ones, order for a quarter-turn ball shutoff valves. They are more reliable and they hardly leak. Rusty old pipe? Change!
FIX SERIOUS PROBLEMS WITH COUPLING
Spoilt iron drainpipes are very difficult to manage, because their slip nuts aren’t easily tighten or loosened. It is possible to prevent these rusty obsolete problems by using a series of plastic pipe. Incase the slip nut joined with the drainpipe on the wall wouldn’t be removed, spray a WD-40 and try a better wrench. If that does not work, use a hacksaw and stop the drain pipe. After this, get a plastic trap adapter and cement the adapter with a 4-inche pipe.
Now you know all about REPLACING KITCHEN SINK, MAJOR PROBLEMS AND HOW TO AVOID THEM:)
More interesting articles:
Kitchen Revamp Ideas Tile Transfer Removable? How To Apply Tile Decals? Why Tile Stickers? Tile Stickers So Good Idea? Grout Cleaning Ideas? Glass Splashback?